On this page
Last updated: November 22, 2022.
🔥 Motivation
It’s 2022, anyone can train a machine learning (ML) model these days. Libraries like PyTorch, Tensorflow, and Scikit-learn have lowered the entry barrier so much, you can get started in minutes.
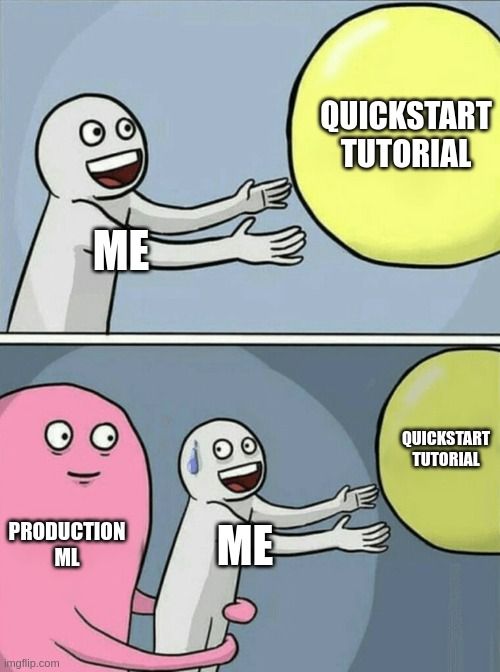
Needless to say, there are tons of quickstart notebooks out there that will walk you through step-by-step. While there are values in quickstarts, especially in the early stages, the code you see in quickstarts often look very different and “unusable in production”, some people might say.
Or, is it?
Is there a way we could transform quickstart code so that they are usable for production ML? Is that even possible?!
With ZenML, yes it is 🚀.
In this post, we will show you how to turn vanilla PyTorch code into a production-ready ML pipeline that can be run on any cloud infrastructure while incorporating the best practices of MLOps. Next, we’ll also show how you can easily manage access credentials and include components like experiment trackers into your pipeline.
By the end of the post, you’ll learn how to -
- Transform a vanilla PyTorch code into ZenML pipelines.
- Visualize the pipeline on an interactive dashboard.
- Configure a Secrets Manager to securely store and retrieve API keys.
- Use the Weights & Biases (W&B) Experiment Tracker to log results and share them.
For those who prefer video, we showcased this during a community session on October 26, 2022. Otherwise, let’s dive in!
☕️ Installation
Let’s begin by installing all the packages we’ll need. We’d highly recommend that you install ZenML in a virtual environment of your choice. Read more in our docs.
Also note that if you’re running this on an M1 Mac, we have a special guide here to set it up.
Now in your virtual environment, run:
pip install "zenml[server]==0.21.1" torchvision==0.14.0To verify if the installation was successful type:
zenml versionIf you don’t encounter any error messages, we’re ready to start hacking!
Let’s initialize a ZenML repository within your current directory with:
zenml initThis creates a .zen hidden folder in your current directory that stores the ZenML configs and management tools.
ZenML comes with various integrations, let’s install the ones we will be using in this post:
zenml integration install pytorch wandb tensorboard mlflow -yWondering if you can use other tools instead? Check out more integrations here. You can even write you own!
✅ Vanilla PyTorch Code
Now that we’re done with the setups, let’s take a look at the “hello world” of PyTorch on the quickstart page.
The code look like the following.
import torch
from torch import nn
from torch.utils.data import DataLoader
from torchvision import datasets
from torchvision.transforms import ToTensor

# Download training data from open datasets.
training_data = datasets.FashionMNIST(
    root="data",
    train=True,
    download=True,
    transform=ToTensor(),
)

# Download test data from open datasets.
test_data = datasets.FashionMNIST(
    root="data",
    train=False,
    download=True,
    transform=ToTensor(),
)

batch_size = 64

# Create data loaders.
train_dataloader = DataLoader(training_data, batch_size=batch_size)
test_dataloader = DataLoader(test_data, batch_size=batch_size)

for X, y in test_dataloader:
    print(f"Shape of X [N, C, H, W]: {X.shape}")
    print(f"Shape of y: {y.shape} {y.dtype}")
    break

# Get cpu or gpu device for training.
device = "cuda" if torch.cuda.is_available() else "cpu"
print(f"Using {device} device")

# Define model
class NeuralNetwork(nn.Module):
    def __init__(self):
        super().__init__()
        self.flatten = nn.Flatten()
        self.linear_relu_stack = nn.Sequential(
            nn.Linear(28*28, 512),
            nn.ReLU(),
            nn.Linear(512, 512),
            nn.ReLU(),
            nn.Linear(512, 10)
        )

    def forward(self, x):
        x = self.flatten(x)
        logits = self.linear_relu_stack(x)
        return logits

model = NeuralNetwork().to(device)
print(model)

loss_fn = nn.CrossEntropyLoss()
optimizer = torch.optim.SGD(model.parameters(), lr=1e-3)

def train(dataloader, model, loss_fn, optimizer):
    size = len(dataloader.dataset)
    model.train()
    for batch, (X, y) in enumerate(dataloader):
        X, y = X.to(device), y.to(device)

        # Compute prediction error
        pred = model(X)
        loss = loss_fn(pred, y)

        # Backpropagation
        optimizer.zero_grad()
        loss.backward()
        optimizer.step()

        if batch % 100 == 0:
            loss, current = loss.item(), batch * len(X)
            print(f"loss: {loss:>7f}  [{current:>5d}/{size:>5d}]")

def test(dataloader, model, loss_fn):
    size = len(dataloader.dataset)
    num_batches = len(dataloader)
    model.eval()
    test_loss, correct = 0, 0
    with torch.no_grad():
        for X, y in dataloader:
            X, y = X.to(device), y.to(device)
            pred = model(X)
            test_loss += loss_fn(pred, y).item()
            correct += (pred.argmax(1) == y).type(torch.float).sum().item()
    test_loss /= num_batches
    correct /= size
    print(f"Test Error: \n Accuracy: {(100*correct):>0.1f}%, Avg loss: {test_loss:>8f} \n")

epochs = 5
for t in range(epochs):
    print(f"Epoch {t+1}\n-------------------------------")
    train(train_dataloader, model, loss_fn, optimizer)
    test(test_dataloader, model, loss_fn)
print("Done!")
You can put all the code into a .py file, and it should run without a problem.
Now let’s see how we can transform the code into a ZenML pipeline.
🥳 Transforming PyTorch code into a ZenML Pipeline.
Before we start, we’d like to first tell you about the concept of pipeline and step in ZenML. This concept will come in handy later when we code.
In ZenML, a pipeline consists of a series of steps, organized in any order that makes sense for your use case.
The following illustration is a simple pipeline that consists of three steps running one after another.
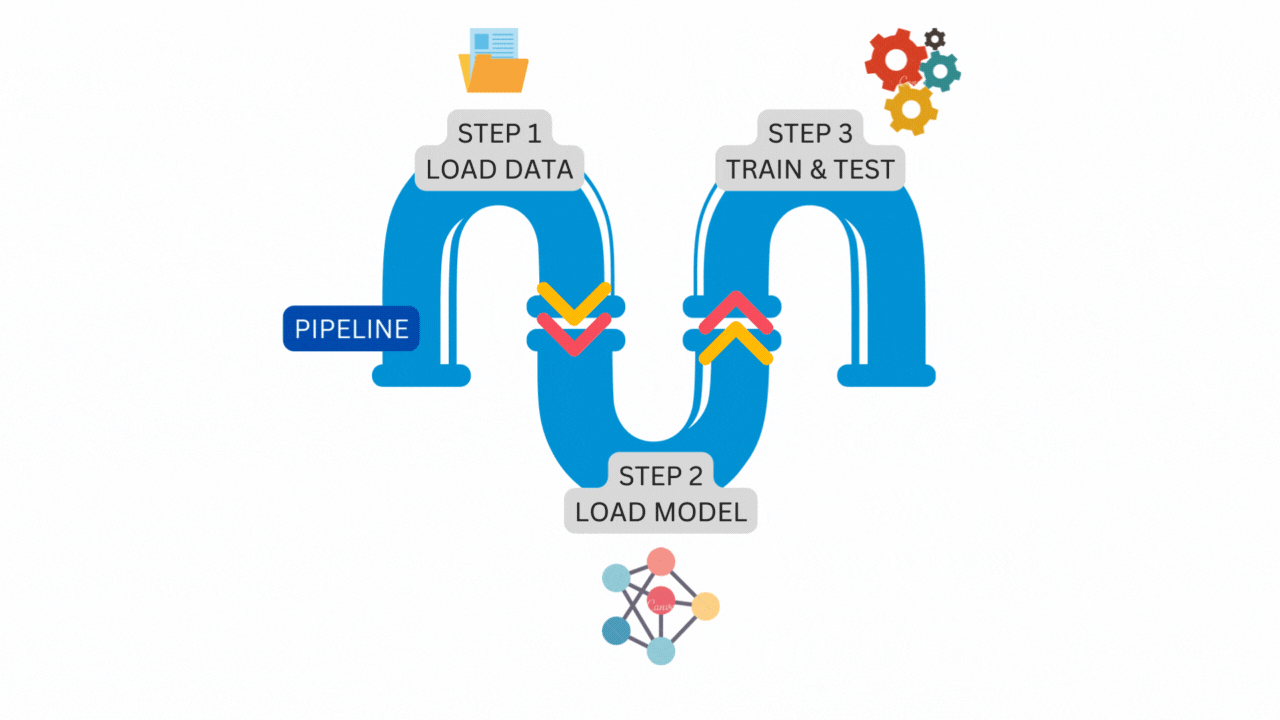
The figure above is the exact pipeline and steps that we will construct from the vanilla PyTorch code. Let’s start the transformation.
First, import modules from torch, torchvision and zenml.
import torch
from torch import nn
from torch.utils.data import DataLoader
from torchvision import datasets
from torchvision.transforms import ToTensor

from zenml.pipelines import pipeline
from zenml.steps import step, Output
Next, let’s define the pipeline.
You can do this by putting a @pipeline decorator above the function definition.
@pipeline
def pytorch_experiment_tracking_pipeline(
    load_data,
    load_model,
    train_test,
):
    """A `pipeline` to load data, load model, and train/evaluate the model."""
    train_dataloader, test_dataloader = load_data()
    model = load_model()
    train_test(model, train_dataloader, test_dataloader)
The pipeline we just wrote takes three steps as the input namely - load_data, load_model, and train_test. Each step runs sequentially one after another.
Next, let’s define what the steps actually do. We can define a step in the same way we define a pipeline, except we put a @step decorator now.
Let’s start with the first step to load the data.
@step
def load_data() -> Output(
    train_dataloader=DataLoader, test_dataloader=DataLoader
):
    """A `step` to load the Fashion MNIST dataset as a tuple of torch Datasets."""
    batch_size = 64

    # Download training data from open datasets.
    training_data = datasets.FashionMNIST(
        root="data",
        train=True,
        download=True,
        transform=ToTensor(),
    )

    # Download test data from open datasets.
    test_data = datasets.FashionMNIST(
        root="data",
        train=False,
        download=True,
        transform=ToTensor(),
    )

    # Create data loaders.
    train_dataloader = DataLoader(training_data, batch_size=batch_size)
    test_dataloader = DataLoader(test_data, batch_size=batch_size)

    return train_dataloader, test_dataloader
One of the best practices we keep when defining a step is type annotation. In simple terms, this means we define the data type for all the inputs and outputs of a step. This is a requirement when defining a step.
For the load_data step above, the outputs of the step are the train and test dataloaders of the DataLoader type in PyTorch. All you have to do is append Output(train_dataloader=DataLoader, test_dataloader=DataLoader) to the function name.
Now, let’s use the same method and define our next step to load the model.
class NeuralNetwork(nn.Module):
    def __init__(self):
        super(NeuralNetwork, self).__init__()
        self.flatten = nn.Flatten()
        self.linear_relu_stack = nn.Sequential(
            nn.Linear(28 * 28, 512),
            nn.ReLU(),
            nn.Linear(512, 512),
            nn.ReLU(),
            nn.Linear(512, 10),
        )

    def forward(self, x):
        x = self.flatten(x)
        logits = self.linear_relu_stack(x)
        return logits

@step
def load_model() -> nn.Module:
    """A `step` to define a PyTorch model."""
    model = NeuralNetwork()
    print(model)
    return model
And the last step, to train and evaluate the model.
# Get cpu or gpu device for training.
device = "cuda" if torch.cuda.is_available() else "cpu"
print(f"Using {device} device")

def train(dataloader, model, loss_fn, optimizer):
    """A function to train a model for one epoch."""
    size = len(dataloader.dataset)
    model.train()
    for batch, (X, y) in enumerate(dataloader):
        X, y = X.to(device), y.to(device)

        # Compute prediction error
        pred = model(X)
        loss = loss_fn(pred, y)

        # Backpropagation
        optimizer.zero_grad()
        loss.backward()
        optimizer.step()

        if batch % 100 == 0:
            loss, current = loss.item(), batch * len(X)
            print(f"loss: {loss:>7f}  [{current:>5d}/{size:>5d}]")

def test(dataloader, model, loss_fn):
    """A function to test a model on the validation / test dataset."""
    size = len(dataloader.dataset)
    num_batches = len(dataloader)
    model.eval()
    test_loss, correct = 0, 0
    with torch.no_grad():
        for X, y in dataloader:
            X, y = X.to(device), y.to(device)
            pred = model(X)
            test_loss += loss_fn(pred, y).item()
            correct += (pred.argmax(1) == y).type(torch.float).sum().item()
    test_loss /= num_batches
    correct /= size
    test_accuracy = 100*correct
    print(f"Test Error: \n Accuracy: {(100*correct):>0.1f}%, Avg loss: {test_loss:>8f} \n")

    return test_accuracy

@step
def train_test(
    model: nn.Module,
    train_dataloader: DataLoader,
    test_dataloader: DataLoader
) -> Output(trained_model=nn.Module, test_acc=float):
    """A `step` to train and evaluate a torch model on given dataloaders."""
    lr = 1e-3
    epochs = 5

    model = model.to(device)
    loss_fn = nn.CrossEntropyLoss()
    optimizer = torch.optim.SGD(model.parameters(), lr=lr)
    test_acc = 0
    for t in range(epochs):
        print(f"Epoch {t+1}\n-------------------------------")
        train(train_dataloader, model, loss_fn, optimizer)
        test_acc = test(test_dataloader, model, loss_fn)
    print("Done!")

    return model, test_acc
We are now done with defining all the steps that take place in a pipeline! What’s left now is to run the pipeline by:
pytorch_experiment_tracking_pipeline(
    load_data=load_data(),
    load_model=load_model(),
    train_test=train_test(),
).run(unlisted=True)
And that’s it! How easy was that? We were only reorganizing the PyTorch code into a series of steps and a pipeline with ZenML. If you put all the code above in a .py script, it should run just like the vanilla PyTorch code in the quickstart.
So why does this matter?
First, you’ve just transformed vanilla PyTorch code into a form that can be run on your local machine and any cloud infrastructure in production. Second, structuring your code into steps and pipelines makes the code modular and easily maintainable. Third, using ZenML pipelines earlier on in your project also means that the code you use in development will look similar to the code in production. This saves a huge refactoring cost when transitioning from development to production.
You can read more about other benefits of structuring your code with ZenML pipelines from the get-go here. Learn more about other ZenML features here which will save you a lot of time and resources in productionalizing ML models.
📊 ZenML Dashboard
ZenML comes with a handy dashboard that lets you visualize the pipeline you just run. To open the dashboard, type in your terminal:
zenml upThis spins up a local ZenML Server and launches the dashboard in the browser at http://127.0.0.1:8237). Key in default as the username and leave the password empty, then click “Log in”.
In the dashboard, you’ll see all details about your Steps, Pipelines, Runs, Stacks, and Stack Components. There’s also a neat visualization on the pipeline which lets you visually inspect your workflow.
The ZenML dashboard lets you visually inspect if the pipeline and steps are in order especially if your steps are complicated and many.
So far we’ve only seen the details about the steps and pipelines in the dashboard. What about the experiment details like training accuracy, loss, etc?
In ZenML experiment details are logged using Experiment Trackers - a component in ZenML.
In the next section, we will show how you can add Experiment Trackers into your workflow so you can monitor and share your experiment results.
⚖ Tracking Experiments and Keeping Secrets
Since we will be using W&B in our pipeline, make sure to create an account at the official site. It’s free to get started. Next, create a project and get the entity, project name and the API key.
Now with those details, let’s put them in our code and start running them, shall we?
Of course not.
Sharing access credentials in your code or files is a quick way to set your butt on fire. We wouldn’t recommend it.

ZenML handles secret information like access credentials with a component known as Secret Managers. Secrets Managers provide a secure way of storing and retrieving confidential information that is needed to run your ML pipelines.
Now let’s configure our W&B credentials into the Secret Manager by running several commands in your terminal.
# Register secret manager
zenml secrets-manager register local --flavor=local

# Updating active stack with the secret manager
zenml stack update default -x local

# Registering the API key in the secret manager
zenml secrets-manager secret register wandb_secret --api_key=YOUR_W&B_API_KEY
The commands above register a secret manager on your local machine, add them to your stack and registers the W&B API key as a secret.
Next, we will set up the experiment tracker by running:
Remember to replace the entity and project_name argument with your own.
To view the configurations of the experiment tracker, run:
zenml experiment-tracker describewhich outputs:
Using the default local database.
Running with active project: 'default' (global)
Running with active stack: 'wandb_stack' (global)
Experiment_Tracker 'wandb_tracker' of flavor 'wandb' with id '47d74df8-b7bf-4e31-904d-cf8d7716d1a5' is owned by user 'default' and is 'private'.
  'wandb_tracker' EXPERIMENT_TRACKER Component
             Configuration (ACTIVE)
┏━━━━━━━━━━━━━━━━━━━━┯━━━━━━━━━━━━━━━━━━━━━━━━━━┓
┃ COMPONENT_PROPERTY │ VALUE                    ┃
┠────────────────────┼──────────────────────────┨
┃ API_KEY            │ {{wandb_secret.api_key}} ┃
┠────────────────────┼──────────────────────────┨
┃ ENTITY             │ dnth                     ┃
┠────────────────────┼──────────────────────────┨
┃ PROJECT_NAME       │ zenml-pytorch-wandb      ┃
┗━━━━━━━━━━━━━━━━━━━━┷━━━━━━━━━━━━━━━━━━━━━━━━━━┛
To get an overview of your current stack, run:
zenml stack describewhich outputs:
Using the default local database.
Running with active project: 'default' (global)
          Stack Configuration
┏━━━━━━━━━━━━━━━━━━━━┯━━━━━━━━━━━━━━━━┓
┃ COMPONENT_TYPE     │ COMPONENT_NAME ┃
┠────────────────────┼────────────────┨
┃ ORCHESTRATOR       │ default        ┃
┠────────────────────┼────────────────┨
┃ SECRETS_MANAGER    │ local          ┃
┠────────────────────┼────────────────┨
┃ EXPERIMENT_TRACKER │ wandb_tracker  ┃
┠────────────────────┼────────────────┨
┃ ARTIFACT_STORE     │ default        ┃
┗━━━━━━━━━━━━━━━━━━━━┷━━━━━━━━━━━━━━━━┛
With that, we are done configuring the Secrets Manager and Experiment Tracker securely.
Let’s build on the code we used in the previous section. All we have to do is add a few more lines where we want W&B to log the information.
The first change is in the imports which include the wandb package now:
import torch
from torch import nn
from torch.utils.data import DataLoader
from torchvision import datasets
from torchvision.transforms import ToTensor

from zenml.pipelines import pipeline
from zenml.steps import step, Output

# 🔥 Import wandb package
import wandb
Next, we add a few lines in the train function. Specifically, we added global_step as the argument so that it can be used to track the loss value.
def train(dataloader, model, loss_fn, optimizer, global_step):
    """A function to train a model for one epoch."""
    size = len(dataloader.dataset)
    model.train()
    for batch, (X, y) in enumerate(dataloader):
        X, y = X.to(device), y.to(device)

        # Compute prediction error
        pred = model(X)
        loss = loss_fn(pred, y)

        # Backpropagation
        optimizer.zero_grad()
        loss.backward()
        optimizer.step()

        if batch % 100 == 0:
            loss, current = loss.item(), batch * len(X)
            print(f"loss: {loss:>7f}  [{current:>5d}/{size:>5d}]")

            # 🔥 W&B tracking
            wandb.log({"Train Loss": loss}, step=global_step)
The same addition in the test function:
def test(dataloader, model, loss_fn, global_step):
    """A function to test a model on the validation / test dataset."""
    size = len(dataloader.dataset)
    num_batches = len(dataloader)
    model.eval()
    test_loss, correct = 0, 0
    with torch.no_grad():
        for X, y in dataloader:
            X, y = X.to(device), y.to(device)
            pred = model(X)
            test_loss += loss_fn(pred, y).item()
            correct += (pred.argmax(1) == y).type(torch.float).sum().item()
    test_loss /= num_batches
    correct /= size
    test_accuracy = 100*correct
    print(f"Test Error: \n Accuracy: {(test_accuracy):>0.1f}%, Avg loss: {test_loss:>8f} \n")

    # 🔥 W&B tracking
    wandb.log({"Test Loss": test_loss, "Test Accuracy": test_accuracy}, step=global_step)
And finally some arguments to the step decorator:
@step(enable_cache=False, experiment_tracker="wandb_tracker")
def train_test(
    model: nn.Module,
    train_dataloader: DataLoader,
    test_dataloader: DataLoader
) -> Output(trained_model=nn.Module, test_acc=float):
    """A step to train and evaluate a torch model on given dataloaders."""
    lr = 1e-3
    epochs = 5

    model = model.to(device)
    loss_fn = nn.CrossEntropyLoss()
    optimizer = torch.optim.SGD(model.parameters(), lr=lr)
    test_acc = 0
    for t in range(epochs):
        print(f"Epoch {t+1}\n-------------------------------")
        global_step = t * len(train_dataloader)
        train(train_dataloader, model, loss_fn, optimizer, global_step)
        test_acc = test(test_dataloader, model, loss_fn, global_step)
    print("Done!")

    return model, test_acc
The rest of the code remains the same. If you run the code the experiment metrics now should appear in your W&B dashboard. Here’s mine

In our example above, we did not log a lot of experiment information for simplicity. But you can always log other metrics from any steps in the pipeline with wandb.log.
💡 Conclusion
Congratulations! You made it!! That’s how easy it is to get started with ZenML.
In summary, you’ve learned how to -
- Transform a vanilla PyTorch code into ZenML pipelines.
- Visualize the pipeline on an interactive dashboard.
- Configure a Secrets Manager to securely store and retrieve API keys.
- Use the Weights & Biases (W&B) Experiment Tracker to log results and share them.
With this new superpower, you can turn any PyTorch code into ZenML steps and pipelines and accelerate your journey to production ML. Using the same steps you can also transform the code from other frameworks like Tensorflow/Keras. Check out this example.

Where to go next? If you’re starting with ZenML we recommend checking out the quickstart to learn more. Or if you’re new to MLOps, check out our ZenBytes repository where we walk you through short practical lessons using ZenML.
Got questions? Join our Slack channel and get a quick response from us!
Last updated: November 22, 2022.