On this page
Last updated: November 14, 2022.
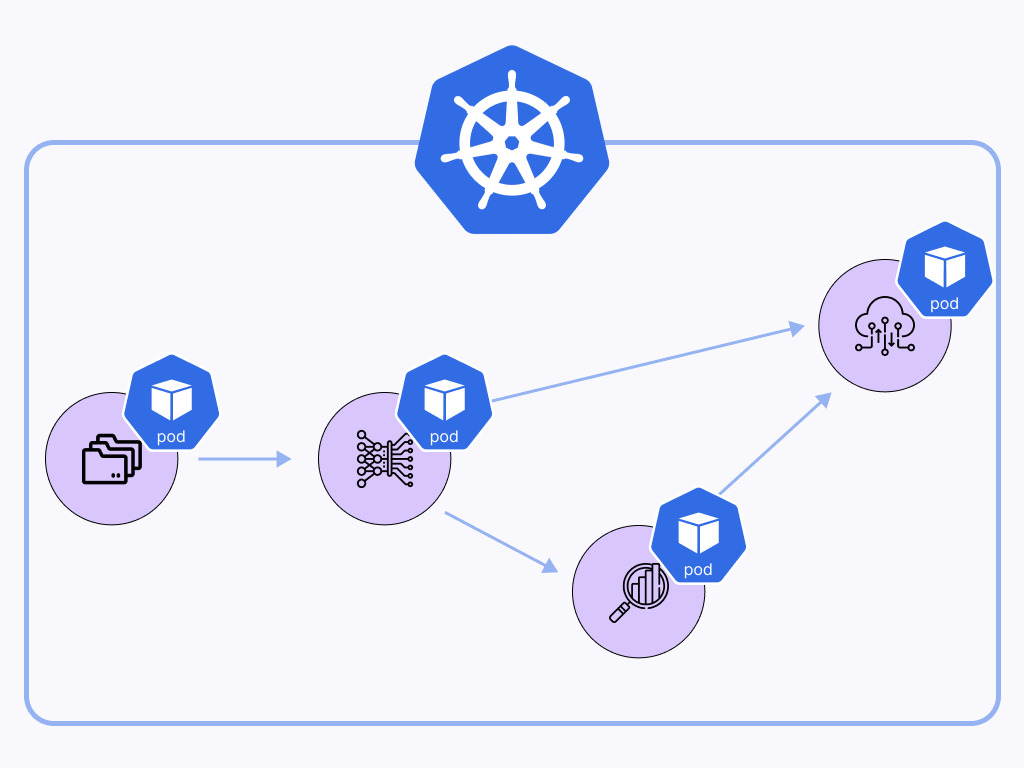
A serverless architecture allows you to run code without having to directly manage infrastructure. This helps the developer focus on the code without worrying about managing infrastructure or costs racking up for continuously running (virtual) machines. Additionally, serverless architectures can quickly scale up to meet the changing needs for computation. Vertex AI pipelines is Google’s very own serverless pipeline orchestration tool that we will be using today.
However, the advantages are only part of the story. As much as serverless architectures can help you quickly scale, they come with a hidden cost: vendor lock-in. As you build your processes and services around the provider specific APIs and you become more and more dependent on the specific provider with significant costs associated with a potential switch.
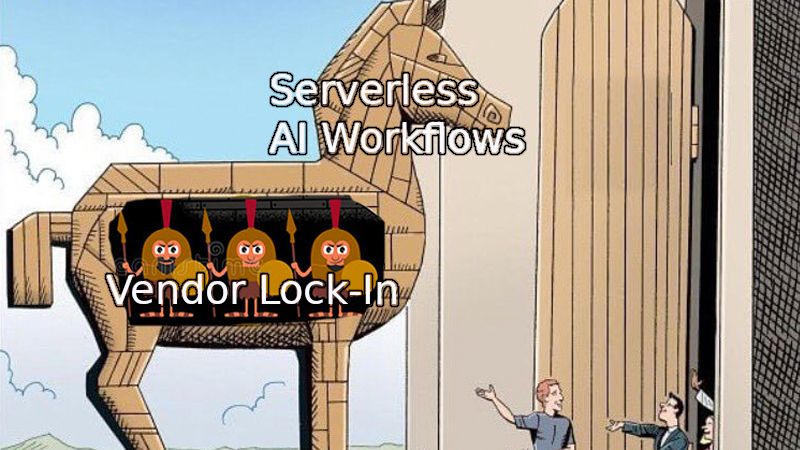
But fret not, ZenML is the perfect abstraction layer that will make it as easy as pie to quickly switch your pipeline orchestration from local to Vertex AI to any of our other Orchestrators.
Prerequisites
This tutorial assumes that you have:
- Python installed (version 3.7-3.9)
- Docker installed and running
- Access to a gcp project space
- gcloud CLI installed on your machine and authenticated
- Remote ZenML Server A Remote Deployment of the ZenML HTTP server and Database
Remote ZenML Server
For Advanced use cases where we have a remote orchestrator such as Vertex AI or to share stacks and pipelines with the team, we need to have a separate, remote ZenML Server. It should be accessible from your machine as well as all stack components that may need access to information or configurations from the server. Read more information about the use case here
In order to achieve this there are two different ways to get access to a remote ZenML Server.
- Deploy and manage the server manually on your own cloud.
- Sign up for ZenML Enterprise and get access to a hosted version of the ZenML Server with no setup required.
Starting locally
To get started we will set everything up locally to initially run our pipeline on our own machine then we will run the pipeline with Vertex AI. To do so we first have to install zenml sklearn and gcp integrations, and we also initialize a ZenML repo.
pip install "zenml[server]"

zenml integration install sklearn gcp

zenml connect --url http://zenml-server... # if you have a remote server

# initialize a local ZenML Repository
zenml init
Now we create a Python file with the following contents in the same directory where we ran zenml init:
import random

from zenml.pipelines import pipeline
from zenml.steps import Output, step

@step
def get_first_num() -> Output(first_num=int):
    """Returns an integer."""
    return 10

@step(enable_cache=False)
def get_random_int() -> Output(random_num=int):
    """Get a random integer between 0 and 10"""
    return random.randint(0, 10)

@step
def subtract_numbers(first_num: int, random_num: int) -> Output(result=int):
    """Subtract random_num from first_num."""
    return first_num - random_num

@pipeline
def vertex_example_pipeline(get_first_num, get_random_int, subtract_numbers):
    # Link all the steps artifacts together
    first_num = get_first_num()
    random_num = get_random_int()
    subtract_numbers(first_num, random_num)

# Initialize a new pipeline run
pipe = vertex_example_pipeline(
    get_first_num=get_first_num(),
    get_random_int=get_random_int(),
    subtract_numbers=subtract_numbers(),
)

pipe.run()
Finally, we can run this python file:
python run.pyAnd voilà, we’ve run our machine learning pipeline locally. Not too impressive, but buckle up, we’ll take this same pipeline to the next level momentarily. But first lets look at our current stack to understand how our pipeline was run and tracked.
zenml stack describeAnd you’ll probably get the following printout:
       Stack Configuration
┏━━━━━━━━━━━━━━━━┯━━━━━━━━━━━━━━━━┓
┃ COMPONENT_TYPE │ COMPONENT_NAME ┃
┠────────────────┼────────────────┨
┃ ARTIFACT_STORE │ default        ┃
┠────────────────┼────────────────┨
┃ ORCHESTRATOR   │ default        ┃
┗━━━━━━━━━━━━━━━━┷━━━━━━━━━━━━━━━━┛
      'local' stack (ACTIVE)
This is your ZenML stack that describes the different components that work hand-in-hand to run and track your pipeline including its artifacts and metadata. This is what we’ll now need to replace with a GCP stack later on.
Setup of GCP Project and Resources
Before we can orchestrate our pipeline using Vertex AI we will need to set up all the required resources and permissions on GCP. This is a one time effort that you will not need to repeat. Feel free to skip and adjust these steps as you see fit. In total, we will create a gcp project, a storage container using Cloud storage, a container registry, a secret manager and vertex ai enabled.
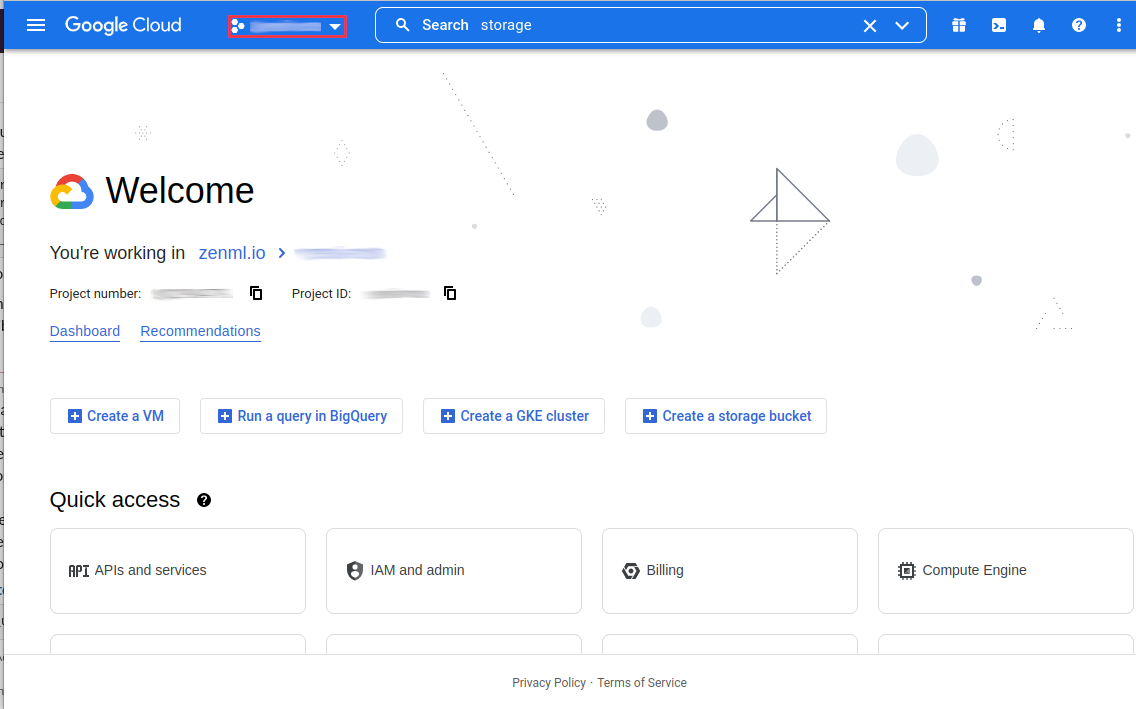
To start we will create a new gcp project for the express purpose of having all our resources encapsulated into one overarching entity.
Click on the project select box
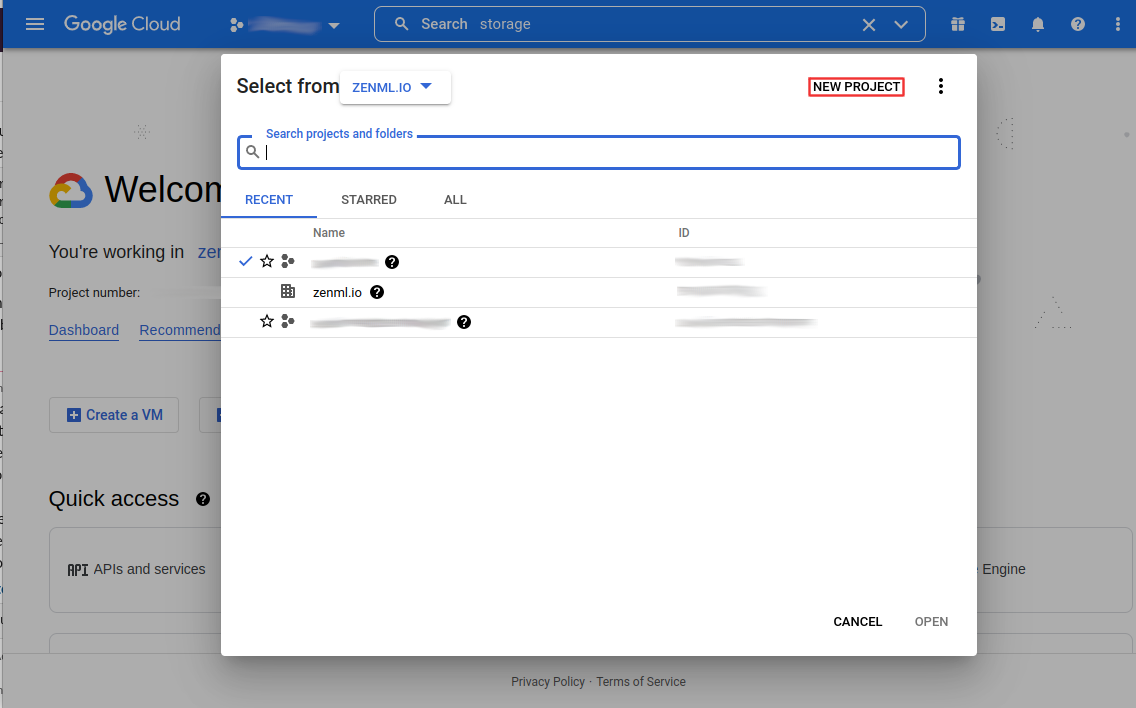
Create a New Project
and name your project
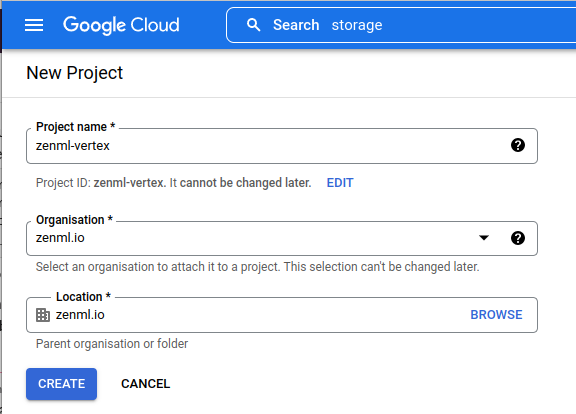
It will take some time for your project to be created. Once it is created you will need to enable billing for the project so that you can set up all required resources.
You will need the project name and project id in the following steps again.
- The project name will be referred to as <gcp_project_name>
- The project number will be referred to as <gcp_project_id>
This project number can be found on your project dashboard.
Cloud Storage
Search cloud storage or use this link.

Once the bucket is created, you can find the storage URI as follows.
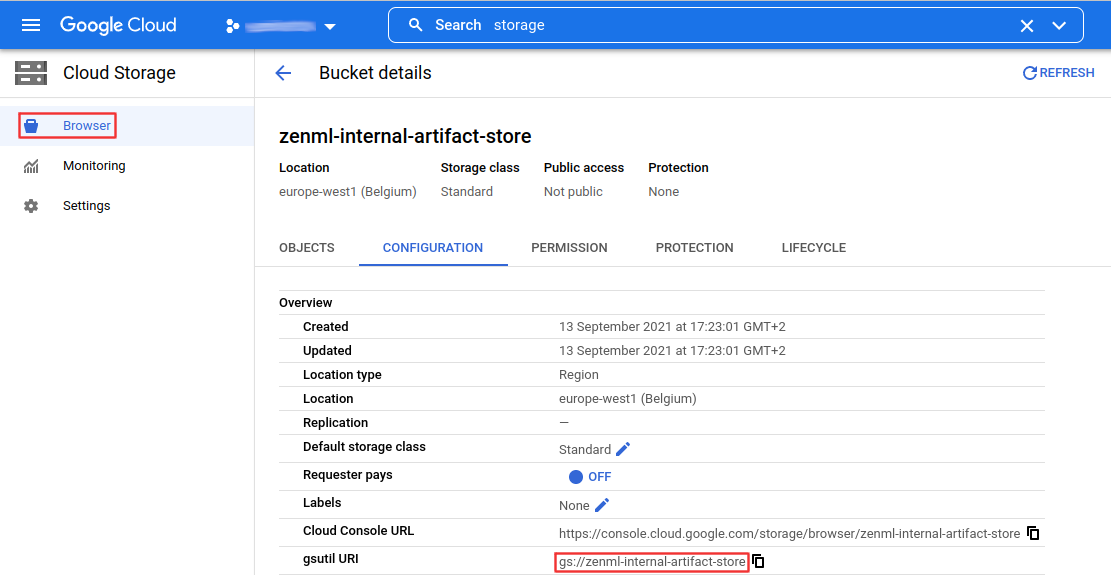
For the creation of the ZenML Artifact Store you will need the following data:
- gsutil URI
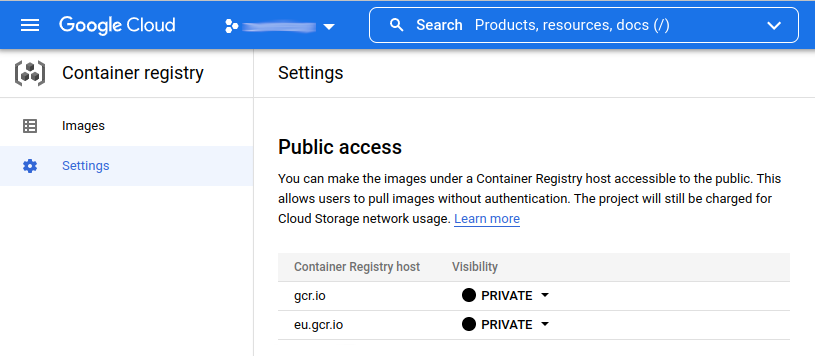
Container Registry
Search container registry or use this link.
You can find your container registry host (<registry_host>) under settings of your projects’ container registry
For the creation of the ZenML Container Registry you will need the following data:
URI - this is constructed as follows <registry_host>/<gcp_project_name>/<custom_name> with the <custom_name> being configurable for each different project that you might want to run.
Secret Manager
- Search secret manager or use this link

You won’t need to do anything else here. The Secret Manager will be uniquely identifiable by the <gcp_project_id> .
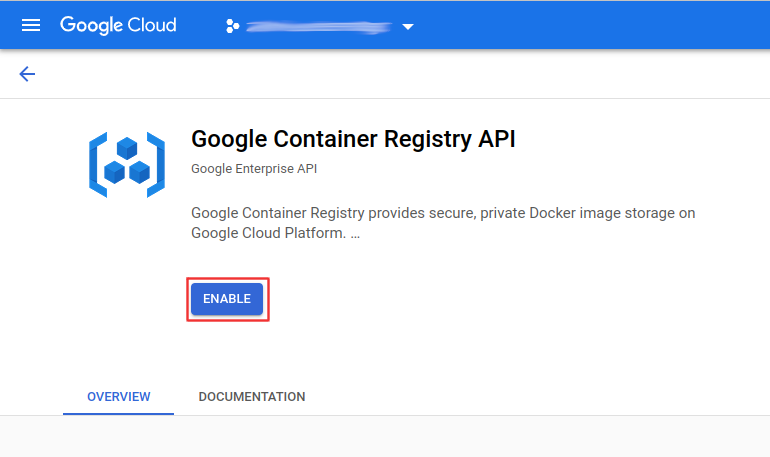
Vertex AI
Search vertex ai or use this link.

Make sure you choose the appropriate region for your location. You will need to remember this location for the ZenML Orchestrator.
Set up Permissions
With all the resources set up you will now need to set up a service account with all the right permissions. This service account will need to be able to access all the different resources that we have set up so far.
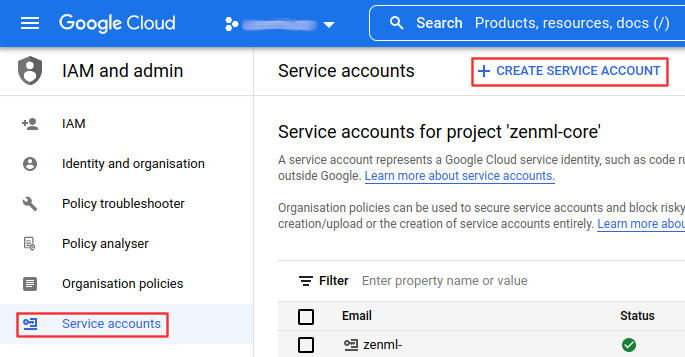
Start by searching for IAM in the search bar or use this link: https://console.cloud.google.com/iam-admin. Here you will need to create a new Service Account.
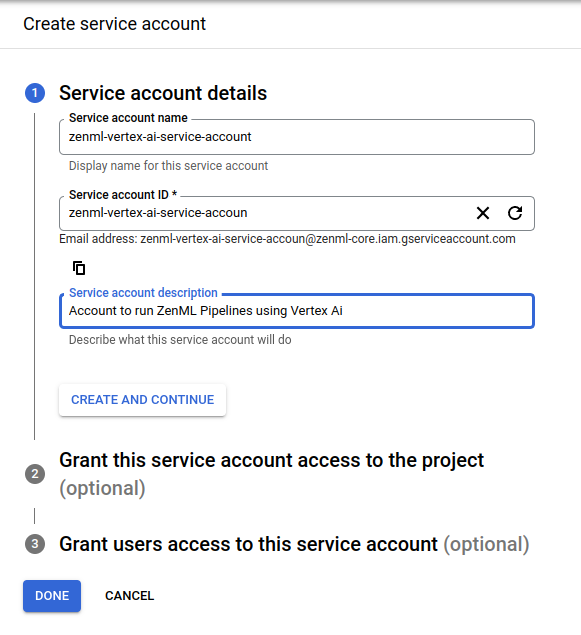
First off you’ll need to name the service account. Make sure to give it a clear name and description.
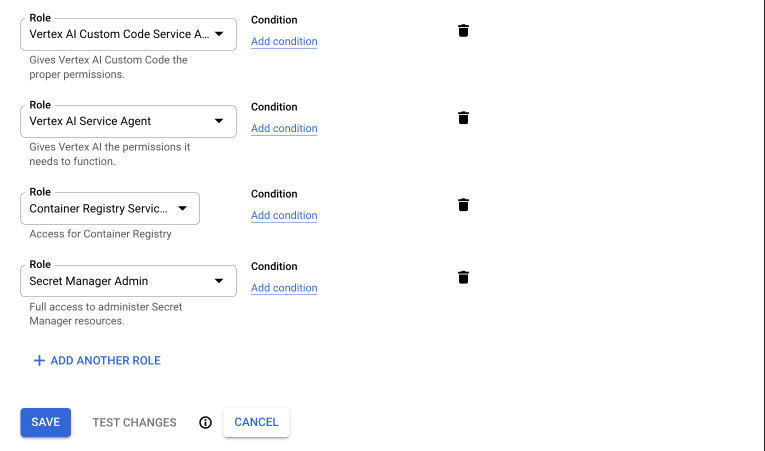
This service account will need to have the roles of: Vertex AI Custom Code Service Agent, Vertex AI Service Agent, Container Registry Service Agent and Secret Manager Admin (for some reason the Secret Manager Secret Accessor role is not enough here).
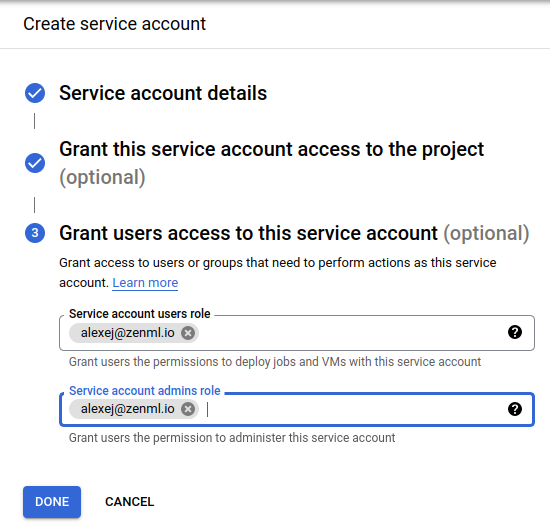
Finally, you need to make sure your own account will have the right to run-as this service account. It probably also makes sense to give yourself the right to manage this service account to perform changes later on.
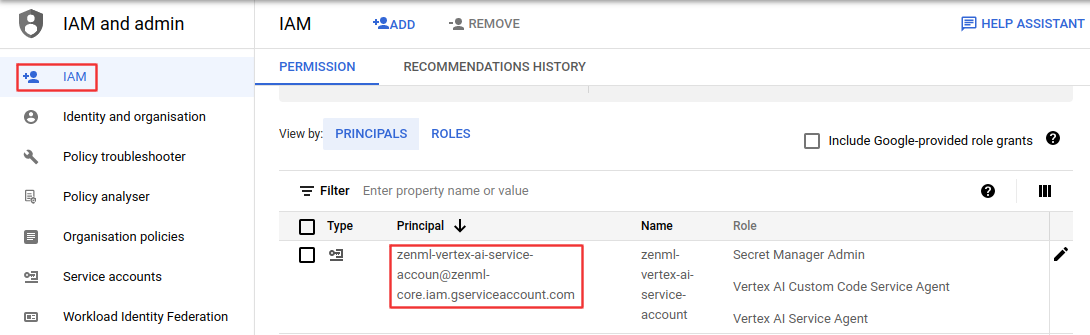
Finally, you can now find your new service account in the IAM tab. You’ll need the Principal when creating your ZenML Orchestrator.
Setting up the ZenML Stack
With everything on the GCP side done, we can now jump into the ZenML side.
ZenML artifact-store
The artifact store stores all the artifacts that get passed as inputs and outputs of your pipeline steps. To register our blob storage container,
zenml artifact-store register gcp_artifact_store --flavor=gcp --path=<gsutil-uri>
</gsutil-uri>
The PATH_TO_YOUR_GCP_BUCKET is the path to your GCP bucket in the following format gs://xxx .
ZenML container-registry
We’ll also need to configure a container registry which will point ZenML to a Docker registry to store the images that ZenML builds in order to run your pipeline.
zenml container-registry register gcp_registry --flavor=gcp --uri=<container_registry_uri>
</container_registry_uri>
The CONTAINER_REGISTRY_URI will have a format like this eu.gcr.io/xxx/xxx. Refer to the gcp container registry
ZenML secret-manager
The secrets manager is used to securely store all your credentials so ZenML can use them to authenticate with other components like your artifact store.
zenml secrets-manager register gcp_secrets_manager --flavor=gcp_secrets_manager --project_id=<project_id>
</project_id>
For the secrets manager, all we’ll need is the gcp PROJECT_ID.
ZenML orchestrator
The orchestrator is responsible for running all the steps in your machine learning pipeline. In this tutorial we’ll use the new Vertex AI orchestrator which, as the name already indicates, uses Vertex AI pipelines to orchestrate your ZenML pipeline.
The orchestrator needs the PROJECT_ID and the GCP_LOCATION in which to run the Vertex AI pipeline. Additionally, you should set the WORKLOAD_SERVICE_ACCOUNT to the service account you created with secret manager access, it will be in the format: [email protected].
zenml orchestrator register vertex_orch --flavor=vertex --project=<project_id> --location=<gcp_location> --workload_service_account=<service_account>
</service_account></gcp_location></project_id>
Combine your stack
Our stack components are ready to be configured and set as the active stack.
zenml stack register gcp_vertex_stack -a gcp_artifact_store -o vertex_orch -c gcp_registry -x gcp_secrets_manager --setRunning
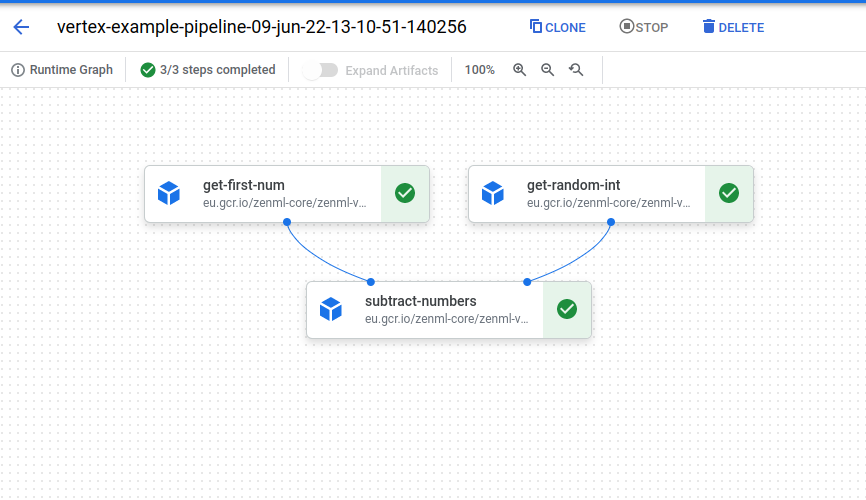
Wow, we’ve made it past all the setting-up steps, and we’re finally ready to run our code on Vertex AI now. All we have to do is call our Python function from earlier, sit back and wait.
python run.pyIn the background zenml will use the active stack to run the pipeline using Vertex AI. To do this the orchestrator will build a Docker image that contains all your pipeline code, including its requirements and push it to the container registry. Additionally, a Vertex AI pipeline job is created which contains the information of how the separate steps of the pipeline are related to each other through their inputs and outputs. Once the Docker image is pushed, Vertex AI can now pull the image and use it to run each step of the pipeline in the correct order. You will see a printout in your terminal that will take you into the Vertex AI UI where you’ll be able to observe live, as your pipeline get executed. It should look a little bit like this:
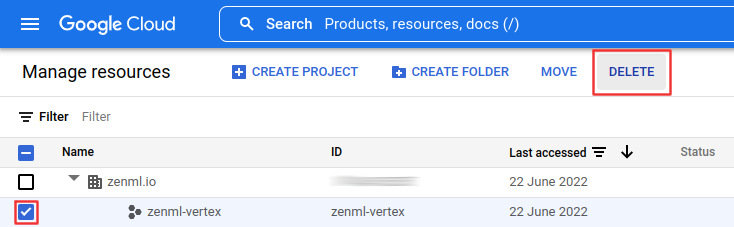
Cleanup
Cleanup should be fairly straightforward now, in case you bundled all of these resources into one separate project. Simply navigate to the Cloud Resource Manager and delete your project:
Conclusion
I hope this guide was able to show you how easy it is to take your code and deploy it on Vertex AI pipelines through the magic of the ZenML Stack without changing the code itself. What this means is, that you will be fully free to switch your orchestrator away from Vertex AI and GCP at any point with minimal effort. For example, you could switch to using our Kubeflow Pipelines Orchestrator to run pipelines on top of Cloud or On-Prem Infrastructure. Alternatively, you could also switch to the completely free Github Actions Orchestrator.
If you have any question or feedback regarding this tutorial, let us know here or join our weekly community hour. If you want to know more about ZenML or see more examples, check out our docs, examples or join our Slack.
[*Image Credit: Photo by *Google]