On this page
Shipping a machine learning model to production is deceptively hard. The model itself is often the easy part, but everything around it often breaks: brittle data pipelines, untracked experiments, inconsistent environments, and deployments held together with duct tape and cron jobs. That’s why the tooling you choose for your ML workflow isn’t just a technical decision; it’s the difference between a team that iterates fast and one that spends half its sprint debugging infrastructure.
Three tools keep coming up in every MLOps conversation: Apache Airflow, the battle-tested workflow orchestrator that powers data teams at scale; MLflow, the go-to standard for experiment tracking and model management; and ZenML, the newer framework betting that ML pipelines deserve their own first-class abstraction.
In this article, we compare MLflow vs Airflow vs ZenML head-to-head to help ML engineers and Python developers decide which tool best fits their real-world use cases for building and deploying ML pipelines.
MLflow vs Airflow vs ZenML: Key Takeaways
🧑💻 MLflow: An open-source platform focusing on the machine learning lifecycle, particularly experiment tracking, reproducibility, and model registry. It’s widely adopted for logging parameters, metrics, and models, but lacks native DAG-based workflow orchestration or a scheduler for complex multi-step workflows.
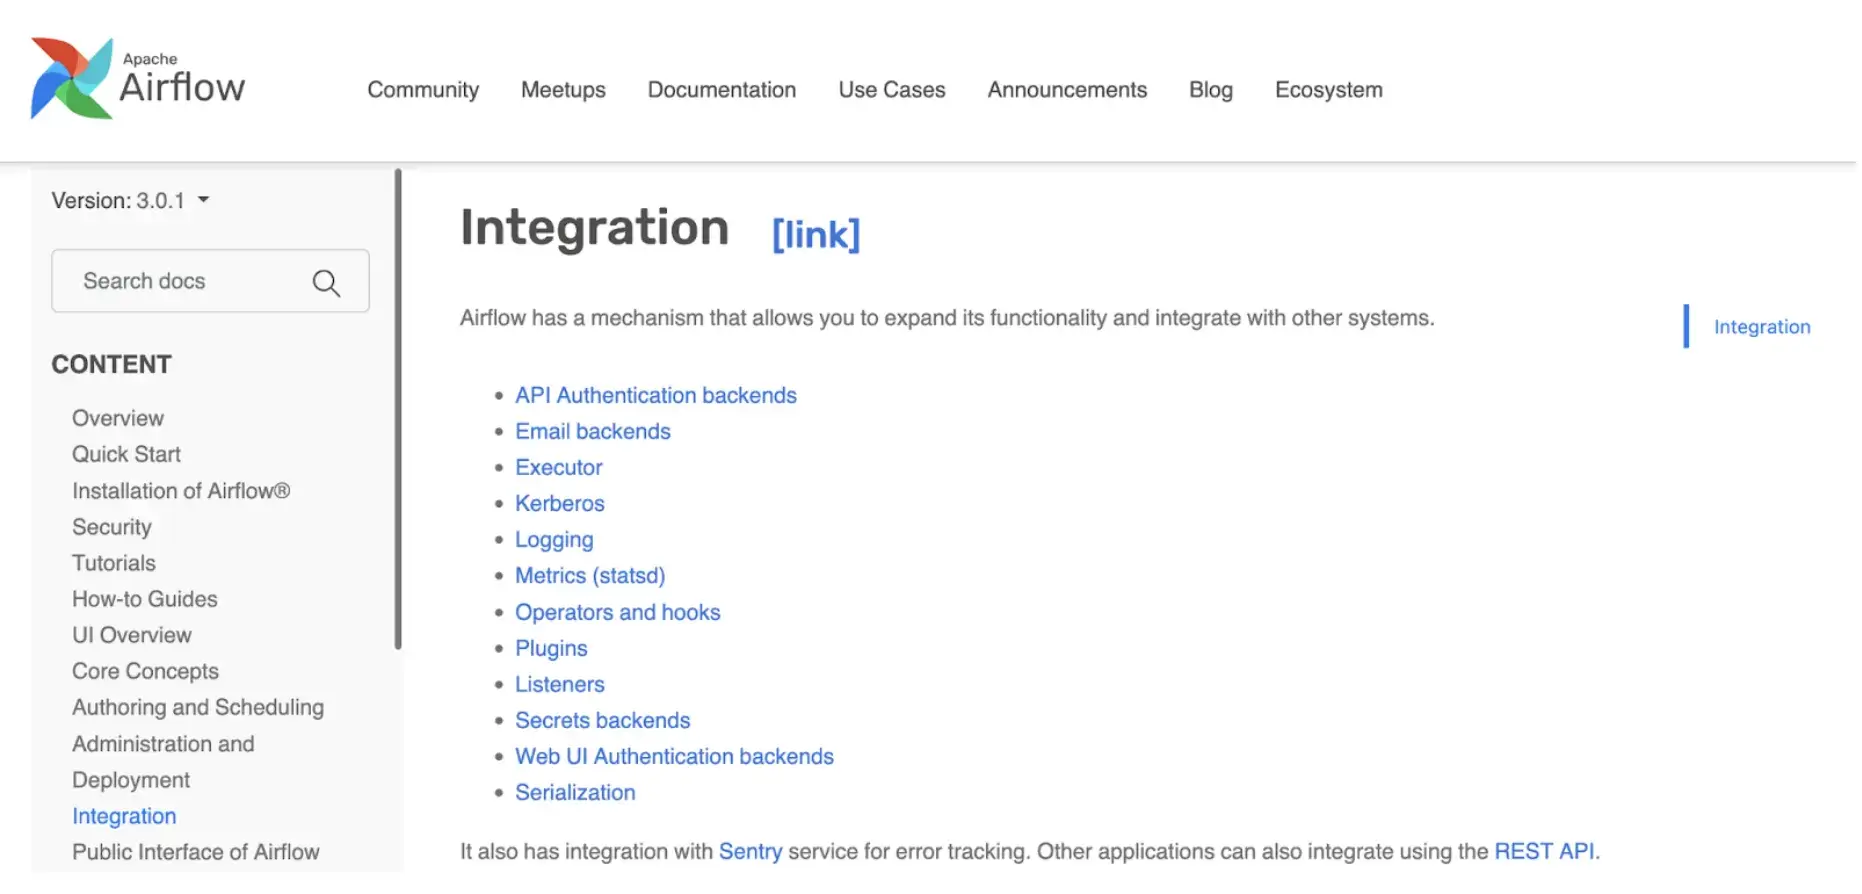
🧑💻 Airflow: A mature, general-purpose workflow scheduler originally built for data engineering pipelines. It excels at defining DAGs of tasks; however, it lacks native ML experiment tracking, model registry, or artifact lineage, so ML-focused functionality must be handled via custom code or external tools.
🧑💻 ZenML: A Python-based MLOps + LLMOps framework that helps teams build reproducible ML pipelines. You write modular pipeline code once and run it on orchestrators like Airflow or Kubernetes without changing anything. It adds ML-specific features like artifact tracking and experiment lineage on top of existing infrastructure.
MLflow vs Airflow vs ZenML: Features Comparison
Let’s compare the three platforms across different parameters of the ML lifecycle. Here’s a table that summarizes this comparison:
| Feature | MLflow | Apache Airflow | ZenML |
|---|---|---|---|
| Pipeline Orchestration | No native DAG engine. MLflow focuses on tracking + packaging (Projects). | Full DAG control; flexible but low-level | Simple Python syntax; ML-native abstractions |
| Experiment Tracking | Best-in-class logging and model registry | None natively; must integrate external tools | Built-in tracking and lineage; integrates with MLflow, WandB, Comet, and more experiment trackers |
| Execution and Scheduling | No scheduler; relies entirely on external systems | Has a strong scheduler with retries and backfills | Scheduling and retries are inherited from the chosen orchestrator |
| Integration | Works with most ML libraries and cloud services | Connects to a wide range of data tools and services | Stack-based; plugs into trackers, orchestrators (including Airflow), deployers, and many other ML frameworks |
Feature 1. Workflow and Pipeline Capabilities
How you define your pipelines affects how easily you can reuse components, manage dependencies, and adapt workflows for ML-specific needs. Let’s compare how each tool serves this purpose:
MLflow
MLflow approaches workflows primarily through MLflow Projects. A Project is a directory or Git repository containing code and an MLproject file, which defines the environment and entry points.
While MLflow Projects help package and run reproducible workflows, it does not provide a DAG or pipeline engine to coordinate multi-step processes. Multi-step coordination is handled by external code or an external orchestrator.
Historically, MLflow offered a template-based workflow feature (MLflow Pipelines, later called MLflow Recipes). As of MLflow 3, Recipes/Pipelines have been removed from open-source MLflow, so they should not be treated as a current workflow engine.
Today, MLflow’s workflow story is primarily:
- MLflow Projects for packaging runnable entry points and environments, and
- External orchestration (Airflow, Kubernetes-native schedulers, CI/CD, etc.) to coordinate multi-step DAG-style workflows.
In practice, MLflow is commonly paired with a dedicated orchestrator whenever you need branching, complex dependencies, retries, and scheduling.
However, MLflow Pipelines are generally opinionated and relatively rigid. They cover standard patterns, but you don’t get the full flexibility of designing arbitrary workflows with branching or complex dependencies and scheduling (custom).
For all these and anything more advanced, MLflow needs to be paired with a dedicated orchestrator.
A typical multi-step workflow in MLflow is a Python script coordinating subprocesses:
# main.py
import mlflow

def workflow():
    # Step 1: Ingest
    mlflow.run(".", entry_point="load_data", parameters={"url": "s3://..."})

    # Step 2: Train (dependent on Step 1 completing)
    mlflow.run(".", entry_point="train_model", parameters={"epochs": 10})

if __name__ == "__main__":
    workflow()
Airflow
In Airflow, you define pipelines as DAGs using Python code. Each node in the DAG is a task that could be anything from running a Python function to executing a bash command or calling an external service.
You then explicitly set dependencies between tasks. The Airflow scheduler manages task execution in the correct order, handling concurrency and failures.
Airflow’s focus on generality means you can orchestrate any process and incorporate database operations, data warehouse ETL, notifications, and more into the same workflow.
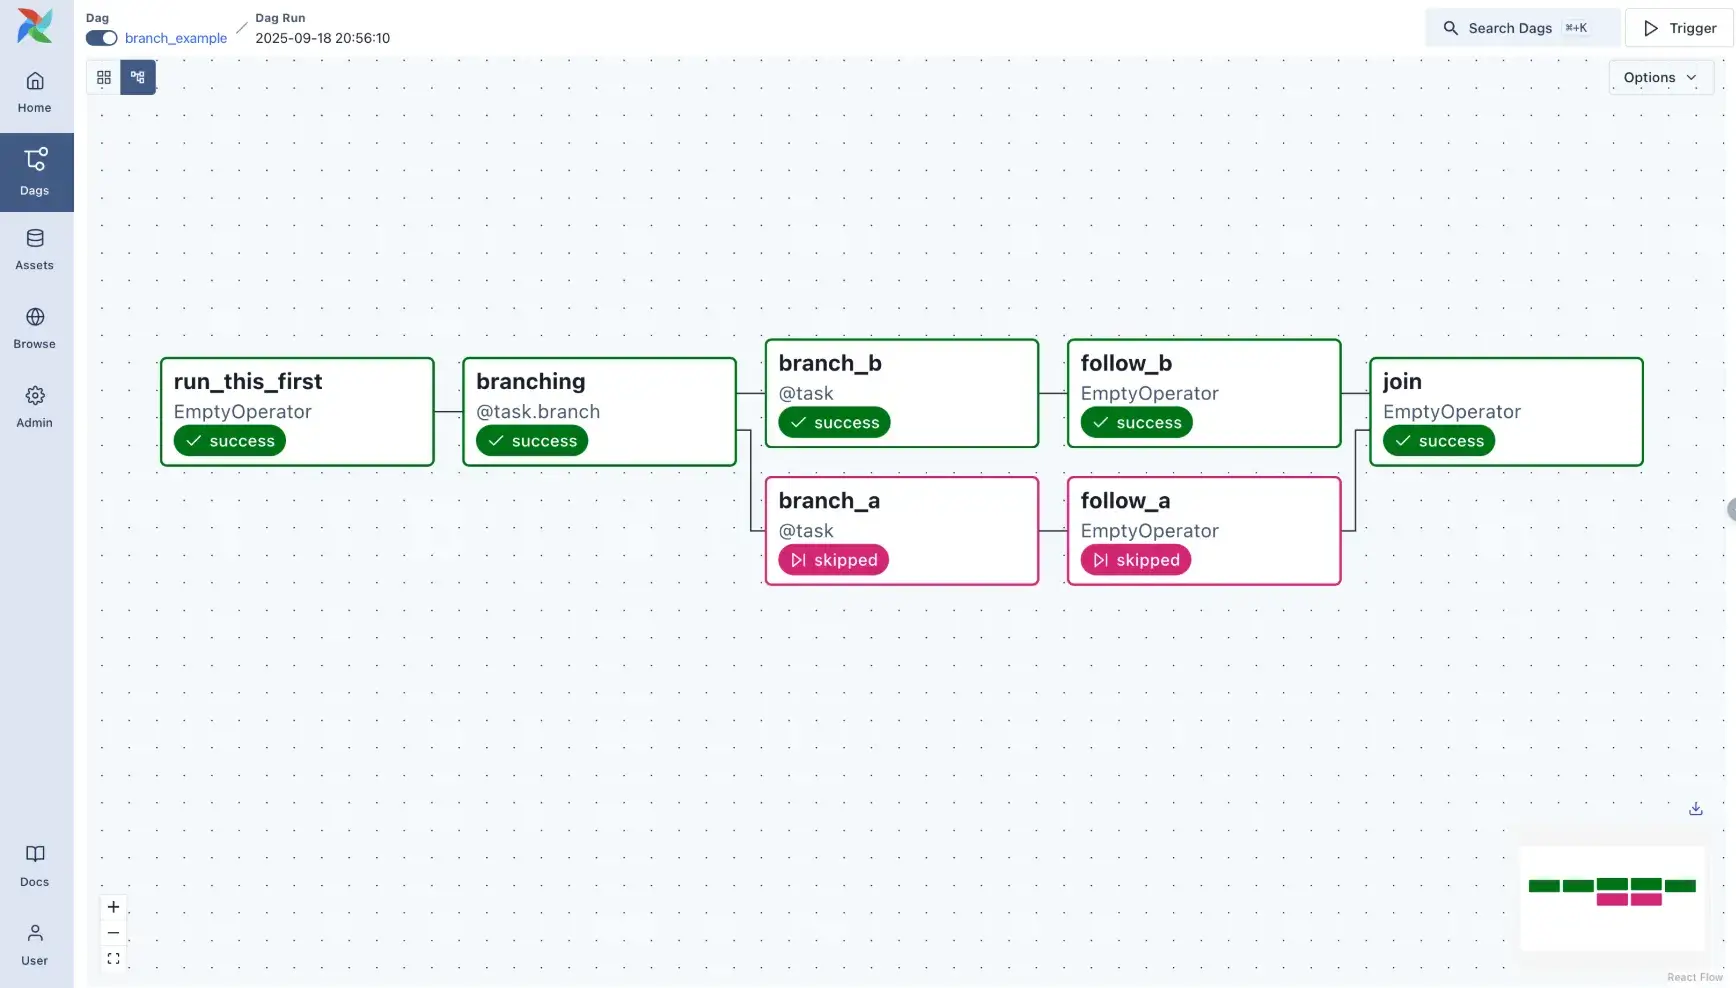
Airflow is intentionally general-purpose: tasks can run anything, and Airflow doesn’t provide ML-native “typed artifacts” out of the box. However, modern Airflow does support data-aware scheduling by letting tasks declare that they update specific Assets (called Datasets in Airflow 2.x). These Assets/Datasets are defined by URIs (for example an s3://... path), which creates an explicit, UI-visible dependency graph between producers and consumers of data.
What Airflow still does not do for you is automatically serialize and version ML artifacts (models, feature sets, evaluation reports) or provide ML-specific lineage guarantees. If you want repeatable ML artifact passing and versioned lineage, you typically need to implement those conventions yourself or pair Airflow with ML tooling built for that purpose.
For a data engineering ETL job, this is fine. For an ML pipeline where you need to trace exactly which dataset version and hyperparameters produced a given model, it creates significant manual overhead.
That said, Airflow doesn’t inherently encourage a library of pipeline steps in the way an ML-specific framework might. Reuse is possible but not automatic. As a developer, you can manage it by writing generic tasks. Many teams use Airflow copy-paste tasks or use shared modules to reuse code. It’s effective, but not as clean as ZenML’s concept of reusable steps, for example.
ZenML
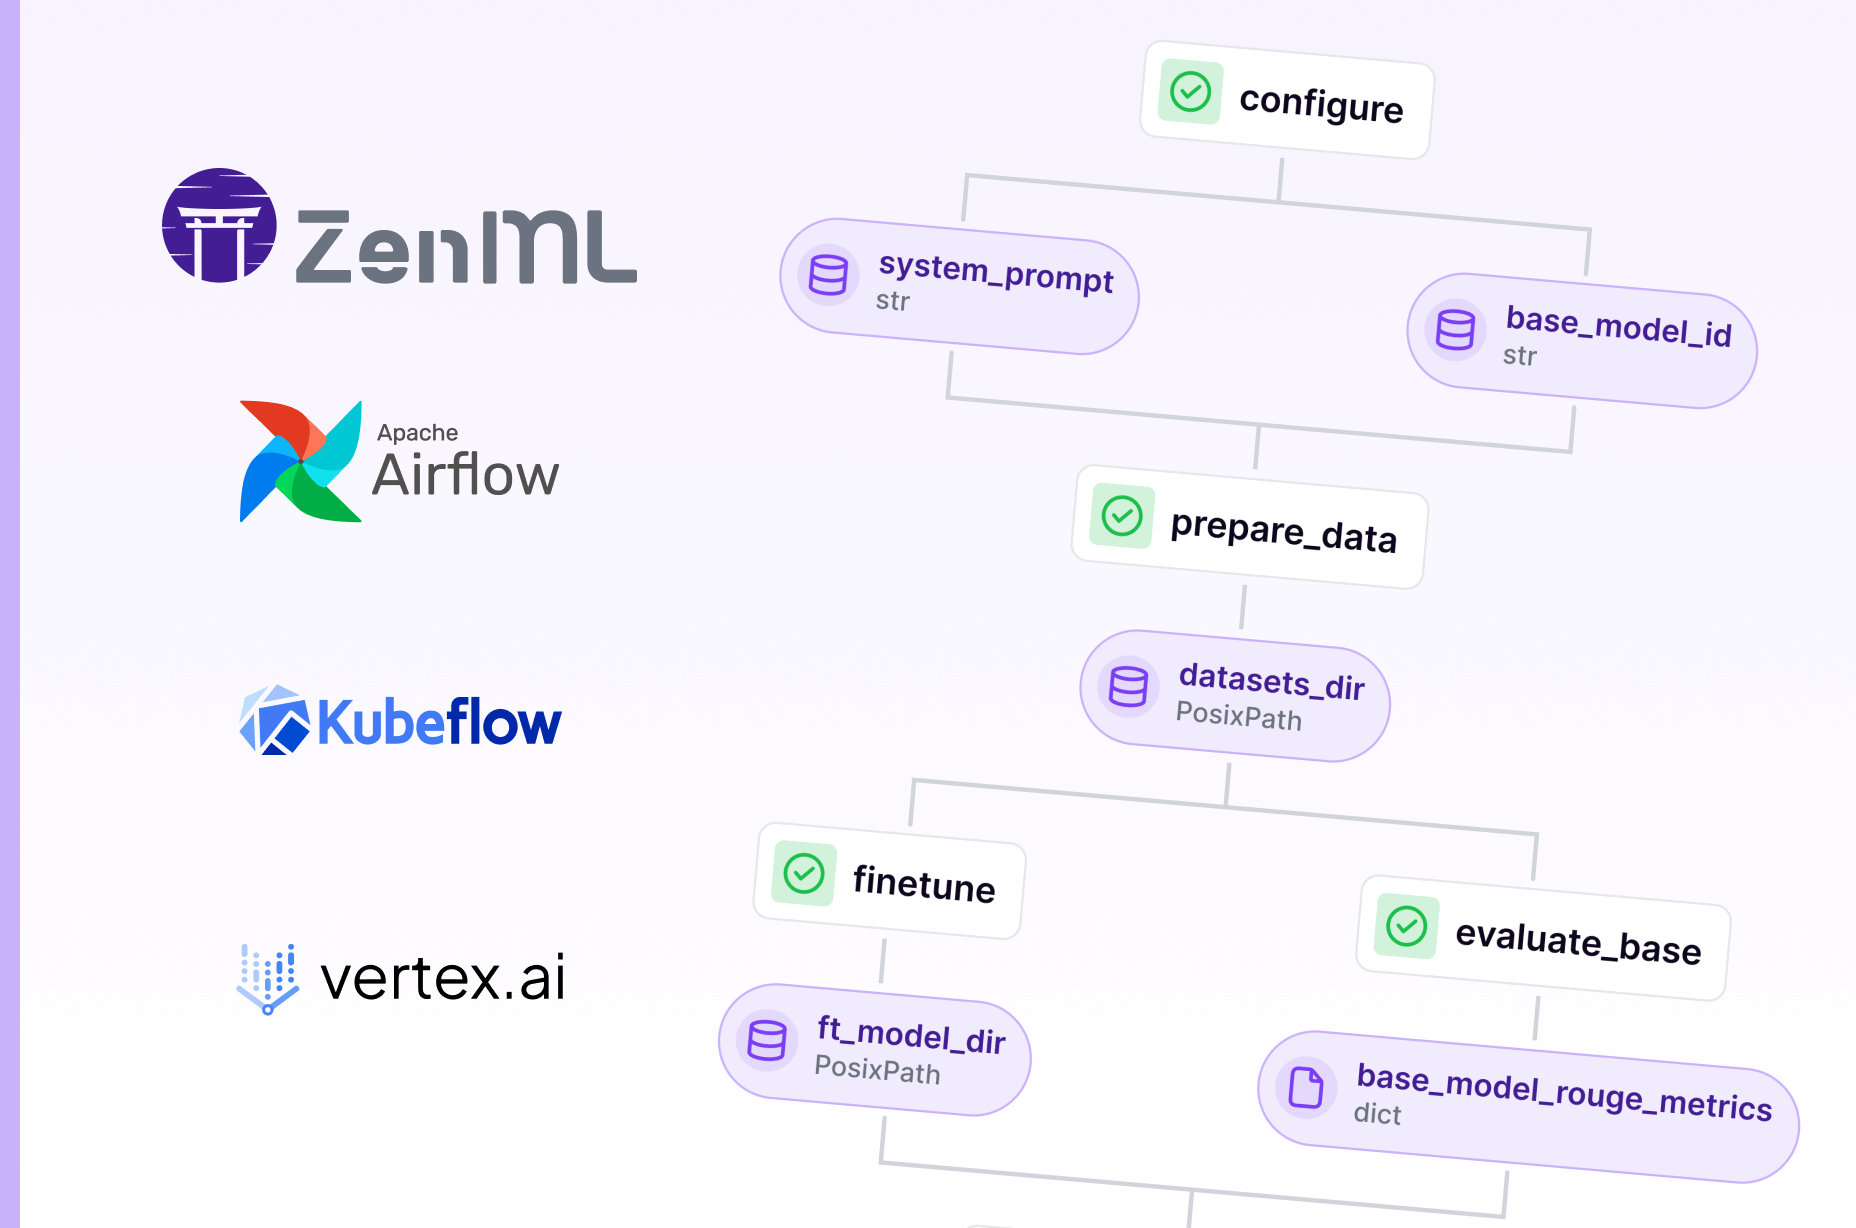
ZenML lets you define ML pipelines using clean Python-based syntax. You write your steps as regular functions with the @step decorator and chain them in a @pipeline.
The dependencies are inferred from how the steps pass data; there’s no need to manually define DAGs or wire up artifacts. Here’s what that looks like:“
from zenml import pipeline, step
@step
def load_data() -> pd.DataFrame:
    ...
@step
def train_model(data: pd.DataFrame) -> Model:
    ...
@pipeline
def training_pipeline():
    df = load_data()
    model = train_model(df)
Each step’s inputs and outputs are tracked automatically, and the artifacts are stored in your configured backend: S3, GCS, local disk, or any other of your choosing. You don’t have to write code to save or load things between steps. It’s all handled for you.
What sets ZenML apart is how easily you can run the same pipeline across different environments.
For example, you can start with a quick local run, then switch to Airflow or Kubeflow by just updating your stack config. Your code stays the same.
ZenML takes care of translating your pipeline into the right format for the orchestrator, including handling parallel steps if supported.
It’s purpose-built for ML workflows, so while it won’t replace a general-purpose DAG tool, it’s far more natural for data scientists and ML engineers building real pipelines. You focus on the logic; ZenML handles the rest.
This is the fundamental difference: ZenML was designed around the assumption that the data flowing between steps matters as much as the steps themselves. In an ML context, that means your DataFrames, models, and evaluation metrics are first-class citizens; automatically serialized, versioned, and linked. You don’t write glue code to pass artifacts between steps; you just return Python objects and let the framework handle the rest.
Bottom line: This is where ZenML really diverges in philosophy when compared to Airflow. Airflow manages tasks and assumes you handle the data. ZenML manages the data flow and generates the task structure for you. MLflow is more limited here, serving as a project packaging format rather than a graph execution engine.
Feature 2. Experiment and Metadata Management
In machine learning, the code is only one part of the equation; ML engineers must track experiments, metrics, and data lineage to ensure reproducibility and to improve models. Let’s compare how each tool handles it:
MLflow
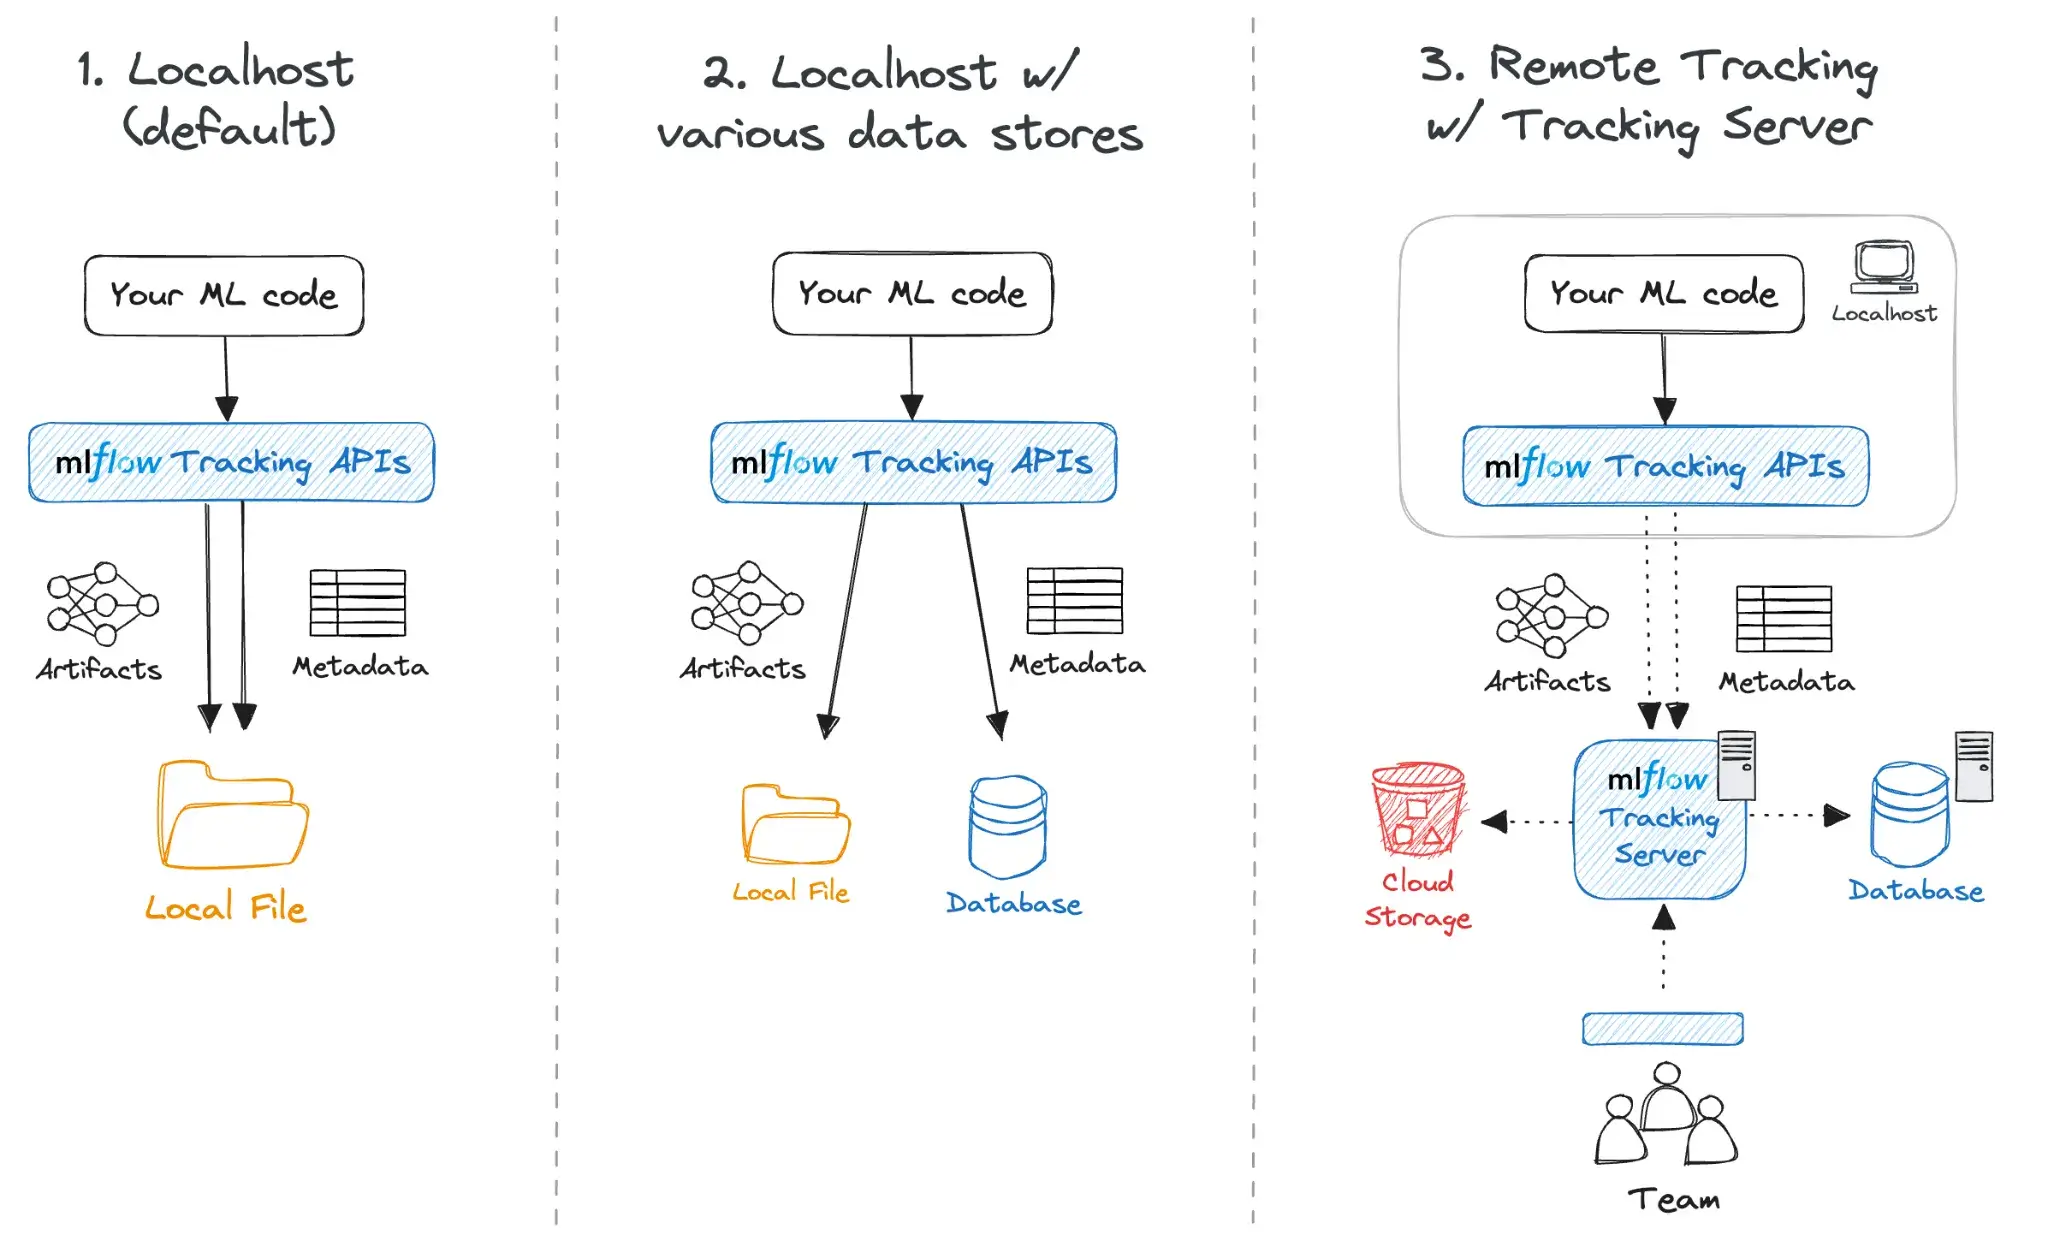
When it comes to experiment tracking, MLflow offers a flexible API and UI to log metrics, parameters, and artifacts from every run. Whether you’re using mlflow.start_run() or a simple mlflow.autolog() , everything gets recorded to a backend like a local folder, cloud storage, or a database.
3 things make it stand out:
- One-liner logging with
mlflow.autolog()for frameworks like TensorFlow, PyTorch, and scikit-learn. - Rich UI for searching, filtering, and comparing runs.
- Manual or automatic logging of files, model binaries, and evaluation plots.
You get an ‘experiment DB’ where every run has a unique ID, timestamp, and all logged context. MLflow also offers a built-in Model Registry to manage models across stages like staging or production. Each version links back to a run, so you can trace what code and parameters created it.
MLflow makes tracking easy, but it doesn’t guarantee end-to-end reproducibility by itself. It does automatically capture some execution context (for example: source file/notebook name, user, and the git commit hash when runs are executed from a git repo). However, you still need to be deliberate about environment management and data versioning, because MLflow won’t magically make an arbitrary workflow reproducible if key inputs (like dataset versions) aren’t tracked.
Airflow
Airflow itself has no built-in experiment tracking or ML metadata management. While it does store the state of tasks and their start/end times, it doesn’t log model metrics, loss, or hyperparameters. You can build these into your DAGs manually, but Airflow won’t surface them in any meaningful way.
Let’s say you’re running a hyperparameter tuning job with 5 different parameter sets. Airflow will show you 5 tasks completed, and you can view logs for each. But it has no concept of these being ML experiments. No central place to compare metrics or models.
What you can do instead is:
- Log metrics to files or databases inside tasks
- Use tools like MLflow, W&B, or TensorBoard inside training steps to track experiments and metadata
- Write custom logic to version and store artifacts in S3, GCS, etc.
Airflow supports passing small values via XComs, and it can also represent data dependencies explicitly using Assets (Datasets in Airflow 2.x), which are identified by URIs (including file-like paths such as s3://...). What it does not do automatically is inspect your task code to infer which files or artifacts were read or written. If you want accurate artifact tracking, you need to declare it explicitly and/or rely on external systems for artifact storage and versioning.
Reproducibility also isn’t built in. You’ll need to manage versioning through containers, source control, and logging inside your tasks.
Thus, Airflow needs to be paired with a proper experiment tracker. That’s why many ML teams use it alongside MLflow. Airflow handles scheduling and retries; MLflow captures the why behind a model’s performance. Without that pairing, Airflow alone leaves too many gaps for ML workflows.
ZenML
ZenML treats experiment tracking and metadata as a core part of the pipeline, unlike MLflow, which allows for ad-hoc logging from loose scripts. When you run a ZenML pipeline, it automatically captures:
- Pipeline and step names
- Inputs and outputs for each step
- Parameters and configs
- Artifact paths
- Execution timestamps and user info
- Execution details like timestamps, who ran it, etc.
This creates a full lineage graph, making it easy to trace how a model was built, with which data, and from which parameters.
Everything connects cleanly: step inputs link to previous outputs, and artifacts are versioned and stored in your configured backend (local, cloud, etc.).
Artifacts are handled by ZenML’s Materializers, which serialize Python objects into appropriate formats like saving a DataFrame as a CSV or a model as an H5 file. You just return Python objects; ZenML takes care of the rest.
Reproducibility is built in. If you rerun a pipeline with unchanged inputs, ZenML can skip steps and reuse cached outputs, saving time and ensuring consistency.
ZenML does not try to replace MLflow’s UI. Instead, it integrates with it. If you want to continue using MLflow’s UI, you can do so inside ZenML.
Bottom line: Experiment and metadata management is where MLflow and ZenML overlap strongly, and where Airflow is weakest. MLflow is a superb experiment tracker with a lightweight approach. ZenML builds many of those tracking concepts into the pipeline execution itself. Airflow is much weaker here, serving only as the trigger for tracking code written elsewhere.
Feature 3. Execution and Scheduling
Execution and scheduling features determine whether a tool can reliably run your workflows at scale on the required infrastructure with automation. In this section, we compare how MLflow, Airflow, and ZenML handle these operational concerns.
MLflow
MLflow, as noted, is not a workflow scheduler, so it doesn’t have a built-in concept of scheduling or executing pipelines repeatedly. That said, MLflow does provide some tools for execution in specific contexts:
mlflow runcan execute a project locally, or submit it to a Databricks cluster or Kubernetes. However, this is a 'fire-and-forget' mechanism.- MLflow Open Source cannot schedule a job to run 'every Monday at 9 AM.' It relies entirely on external schedulers (like Airflow or cron) to trigger it.
- If you use the Databricks platform, MLflow integrates with Databricks Workflows, which provides a robust scheduler. But this is a feature of the Databricks platform (managed MLflow, that’s paid), not the open-source MLflow tool itself.
So, in terms of execution and scheduling, MLflow is minimalistic. It is lightweight and can be inserted into any execution context, but it cannot schedule or parallelize jobs on its own.
Airflow
Airflow’s scheduler is robust, capable of handling complex cron expressions, intervals (@daily), and data-aware scheduling via Assets (called Datasets in Airflow 2.x), where DAGs can be triggered based on updates to declared data assets.
Execution is flexible through different executor options:
- Sequential/Local: for simple, local dev runs
- Celery: scales tasks across worker nodes
- Kubernetes: launches tasks in separate pods, ideal for isolation and resource control
You can also use custom Operators to trigger external jobs, like running Spark or submitting a Ray cluster task. For example:
from airflow.providers.cncf.kubernetes.operators.kubernetes_pod import KubernetesPodOperator

KubernetesPodOperator(
    task_id="train_model",
    image="ml-training:latest",
    cmds=["python", "train.py"],
    resources={"limit_memory": "4Gi", "limit_gpu": "1"},
    ...
)
Some other features that make it strong for production pipelines:
- Retries and alerts if a task fails
- Backfills for missed schedules
- Sensors and trigger rules for event-driven runs
- Pools and queues for basic resource control
Airflow does not model GPUs at the ML abstraction level, but can request GPU resources via Kubernetes or custom operators. For ML teams, it provides the backbone to run training, evaluation, or deployment tasks on schedule or in response to new data.
ZenML
ZenML executes pipelines through the orchestrator in your active stack. The default local orchestrator runs steps on your machine, while remote orchestrators (like Airflow or Kubeflow) translate and dispatch runs to external infrastructure.
For example, with the Airflow orchestrator, ZenML generates an Airflow DAG for your pipeline and submits it to an Airflow server you’ve configured. You then rely on Airflow for scheduling, retries, parallelism, and operational controls.
ZenML supports defining pipeline schedules, but schedule execution is still implemented by the orchestrator you run on. Not all orchestrators support schedules, and “native” schedule lifecycle management differs by backend. For example, the Kubernetes orchestrator can manage schedules as Kubernetes CronJobs, while other orchestrators may require you to manage the schedule on the orchestrator side and use ZenML to track the schedule configuration and history.
ZenML’s approach offers incredible flexibility but introduces a dependency on the underlying orchestrator. If the underlying Airflow cluster is misconfigured, the ZenML pipeline will fail.
Bottom line: For execution and scheduling, Airflow stands out as the fully-fledged scheduler, capable of handling complex timing, retries, and resource allocation on its own. ZenML depends on the chosen orchestrator for these capabilities; it decouples the pipeline logic from the execution backend, which is powerful for portability. MLflow is the most limited here, providing no scheduler or orchestrator features and relying entirely on external processes.
MLflow vs Airflow vs ZenML: Integration Capabilities
In MLOps, integration capability tells you how well a tool fits within an existing ecosystem.
MLflow
MLflow integrates with many ML libraries and services, and it’s commonly used across frameworks like TensorFlow, PyTorch, scikit-learn, and XGBoost with autologging support in many cases.
Infrastructure is flexible too:
- Tracking server: SQLite, MySQL, or PostgreSQL
- Artifact store: Local disk, S3, GCS, Azure Blob, etc.
- Serving: Deploy models to SageMaker, Azure ML, or Kubernetes using built-in plugins
MLflow’s open-source model format (MLmodel) is widely supported, making it easy to plug into other tools. It’s not meant to handle data ingestion or orchestration, but it logs from almost anywhere with minimal friction.
Airflow
Airflow has a massive library of Providers. Whether you need to connect to Snowflake, Salesforce, AWS Redshift, or Slack, there is likely an Airflow Operator for it. This makes it one of the strongest general-purpose tools for orchestrating data movement.
ZenML
ZenML is built as an integration layer. You define pipelines once and swap tooling through stack components.
Key ZenML integrations:
- Orchestrators: Airflow, Kubeflow, Kubernetes, Tekton, SageMaker Pipelines, Vertex AI Pipelines, AzureML Pipelines
- Experiment tracking: MLflow, Weights & Biases, Comet
- Model deployment: KServe, Seldon, MLflow serving, SageMaker endpoints
- Cloud training/compute: SageMaker step operator, Vertex AI step operator, Azure ML support
- Validation + quality: Great Expectations (data checks)
- Automation/ops: alerts and pipeline hooks (for example, Slack notifications)
MLflow vs Airflow vs ZenML: Pricing
MLflow
MLflow is open-source and free to use. You can self-host it, which incurs infrastructure and maintenance costs. Managed MLflow services, like those on Databricks or AWS, charge based on the compute and storage resources you consume.
Airflow
Free to use, but you manage the scheduler, web server, and workers.
Providers like Amazon MWAA (Managed Workflows for Apache Airflow) or Astronomer charge based on usage and underlying infrastructure, which can get expensive if clusters are overprovisioned or sit idle.
ZenML
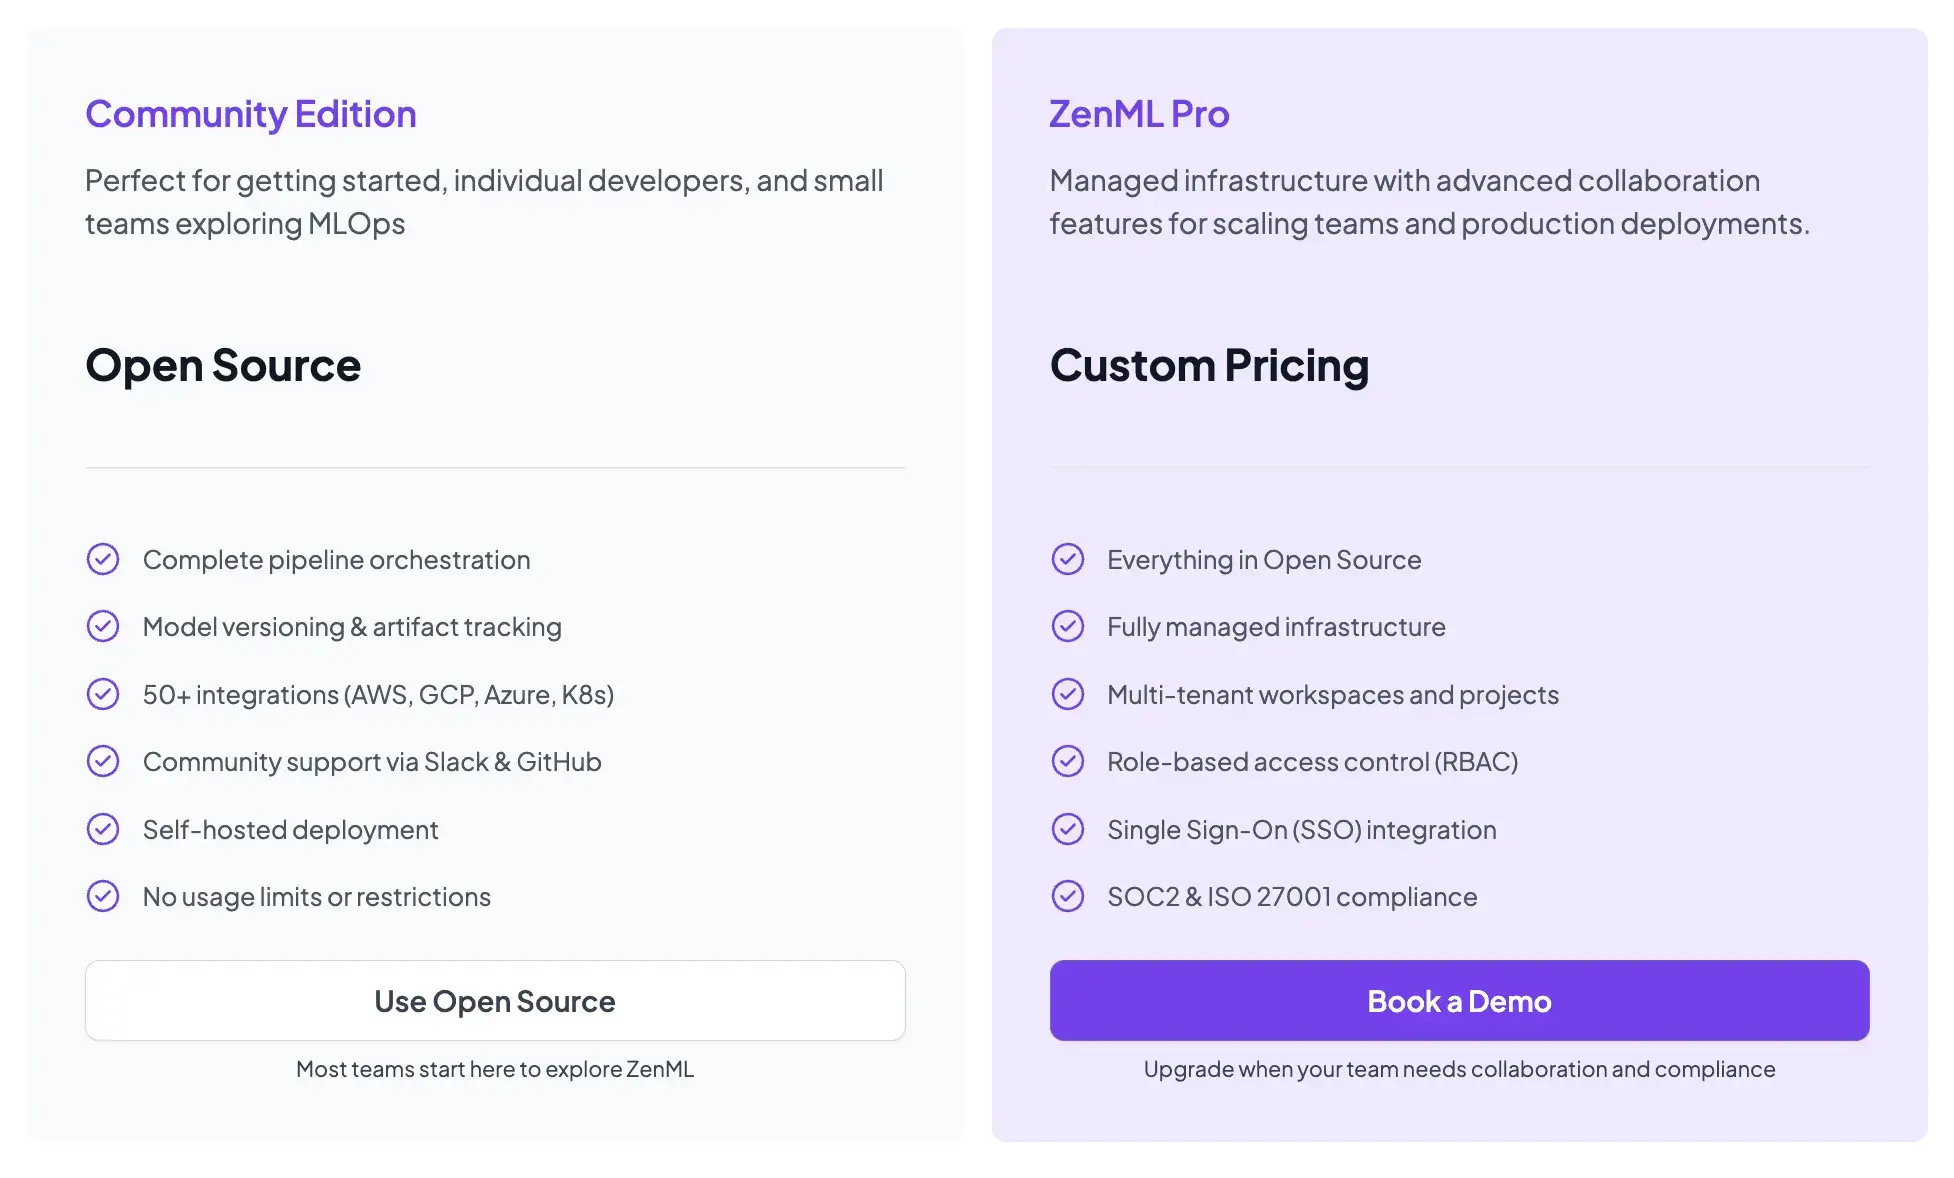
ZenML is also open-source and free to start.
- Community (Free): Full open-source framework. You can run it on your own infrastructure for free.
- ZenML Pro (Custom pricing): A managed control plane that handles the dashboard, user management, and stack configurations. This removes the burden of hosting the ZenML server yourself.
📚 Relevant articles to read:
Which Tool is the Best to Deploy Modern ML Pipelines
In a mature MLOps stack, these tools often complement each other. But here’s a little advice from me on when to use one over the others:
- Choose MLflow if you primarily need a robust, well-adopted experiment tracking and model registry solution, and you already have a way to orchestrate and schedule your pipeline runs.
- Choose Airflow if you need a reliable, general-purpose orchestrator to automate workflows on a schedule, especially when those workflows span various data and infrastructure tasks.
- Choose ZenML if you want an ML-native pipeline framework that sits on top of existing orchestrators and experiment trackers. ZenML is particularly valuable when your team needs portability across infrastructure; you can write your pipeline once and move between Airflow, Kubeflow, Kubernetes, or cloud-managed services without rewriting a single line of pipeline code.